GameDev Tutorial - Creating a Simple
Game
 |
Step 4 -
Defining Tile Categories and Solidity
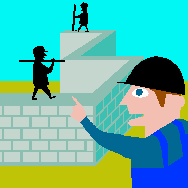
Tiles are categorized for two
purposes. Mainly, these categories can be used to create
a solidity definition. A solidity definition determines
which tiles are solid and what shape they are so that
sprites can react to solid areas of the map properly.
Secondly, categories are used in defining
inventory/map interactions
for the player. For instance, if the player could
eliminate any "boulder" tiles from the map when
in posession of a "pickaxe" item, all images of
boulders would be categorized together as tiles affected
by the pickaxe. This step of the tutorial will lead you
through creating both types of categories.
|
To access the Tile Categories dialog,
select "Tile Categories" from the View Menu in the main
project window.
 This dialog allows
you to categorize the tiles of a tileset into named categories.
Each tileset has its own distinct index of category names. That
is to say, you can define a category called "Solid" for
the "Tutorial" tileset, and define another category
called "Solid" for another tileset.
This dialog allows
you to categorize the tiles of a tileset into named categories.
Each tileset has its own distinct index of category names. That
is to say, you can define a category called "Solid" for
the "Tutorial" tileset, and define another category
called "Solid" for another tileset.
Of course this tutorial only deals with a
single tileset so all the categories will apply to that tileset.
Start by selecting the tileset in the "Tileset" box.
Type the name "Solid" in the "Current
Category" box. The category will automatically be created
once you drag a tile from the "Tiles available" box to
the "Tiles in this category" box.
In the "Tiles available" box,
locate all the tiles that were included in the Tilematch
definition from step 2. Of these tiles, drag all the tiles
without any black pixels into the "Tiles in this
category" box. This category will define tiles that are
solid squares.
To create another category, type the name
of the category in "Current Category". As you start
dragging you will see the "Tiles in this category" box
go blank indicating a new category. The list below indicates more
categories you should create, and which tiles belong in them.
- Category
"Uphill":

- Category
"Downhill":

- Category
"Upceil":

- Category
"Downceil":

These are all the
categories required to make one complete "Solidity
Definition". Enter the name "TutorialSolid" into
the "Solidity Definition Name" box. Then select
"Solid" in the "Solid tile category" box,
select "Uphill" in the "Uphill tile category"
box and so on until each box has a tile category specified. Save
the solidity definition by clicking the "Save" button.
This completes the
solidity definition, now let's add a few categories to use with
the player's inventory and map interaction.
First we'll categorize
the two items in their own categories. Sometimes it may be useful
to categorize multiple tiles as a single item (if multiple
pictures can represent the same inventory item) but this is not
the case here.
Type the name
"Staff" in the "Current Category" field and
drag the tile representing the staff into the "Tiles in this
category" box. Then type the name "Scraper" in the
"Current Category" field and drag the scraper tile into
the category. There should now be a total of 7 categories.
To make things
interesting, the scraper item should probably not break through
all walls, just exterior walls. To make this easy, we'll add all
the exterior wall tiles to a category. Type the name
"Exterior" into the "Current Category" field.
Drag all tiles, that are part of the Tilematch definition
(defined in step 2) and that also contain white (edge) pixels
into the category.
Those are all the categories we'll be
using in this tutorial. Some other points to note about
categories:
- Categories cannot be renamed through
this user interface since typing a new name creates a new
category.
- Like a Category, a Solidity
Definition applies to a specific Tileset. Each Tileset
may have its own definition of "TutorialSolid"
or "PlayerObstacles" for insance.
- Dragging tiles into a category
affects the project instantly while a Solidity Definition
is not saved until the "Save" button is
clicked.
- To remove a tile from a category,
drag it from the "Tiles in this category" box
back into the "Tiles available" box.
Now is a good time to save the project
again. All the tile categories and solidity definitions are
stored in the .GDP project file.
This concludes Step 4 of the GameDev
tutorial - Defining Tile Categories and Solidity.
Return to the main
tutorial page.
Jump to the next step
in the tutorial.